How To Print Your Own Key Tags for Dealerships
by Chelsea Camper | Last Updated July 19, 2019Dealerships are constantly in need of key tags to help organize customer keys, cars, and paper work. It can get expensive to constantly be buying pre-printed key tags, not to mention if your logo or message changes, you might wind up with a lot of useless, pre-printed key tags on your hands.
By printing your own key tags you can change the message or design on the key tag whenever you need to, print only as many as you need, and always have extra blank stock on hand in case you need a duplicate or replacement.
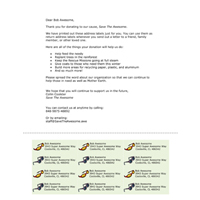
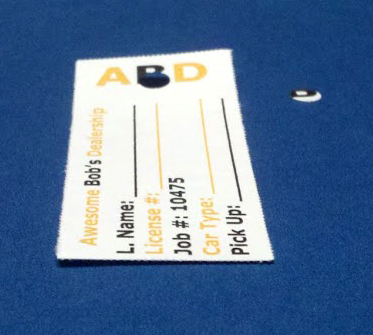
In this post we’re going to use the example of Bob’s Awesome Cars. Bob’s Awesome Cars deals exclusively in maintaining and repairing cars with awesome paint jobs. They also provide awesome paint jobs.
So lets take a look at how Bob, and you, can print your own key tags for your dealership.
Step 1: Download the Key Tag Template
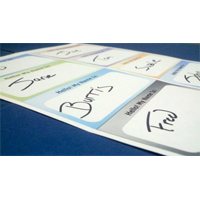
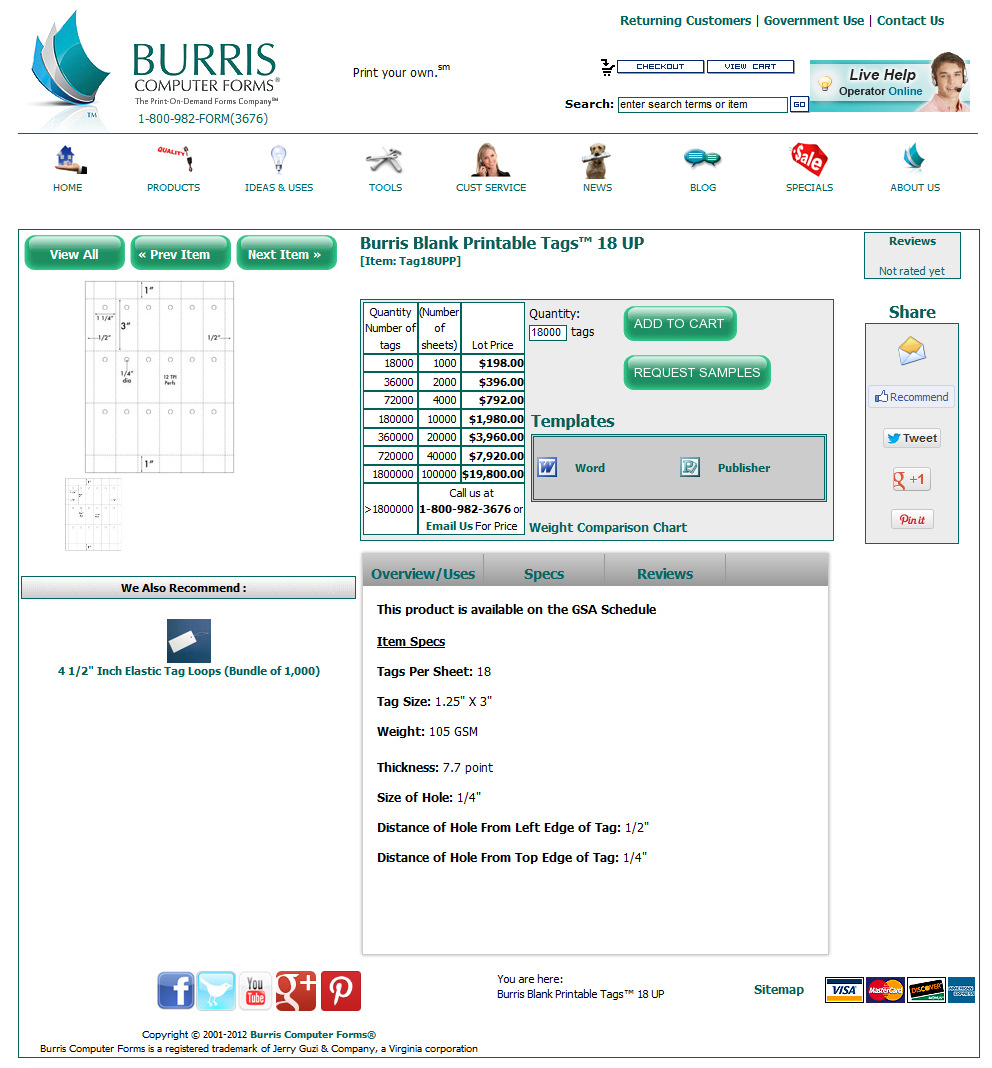
Once you’ve decided on what kind of key tag you want, download the template. We’re going to be using the Tag18UPP. This tag layout has 18 tags on a sheet that are 1 1/4″ wide and 3″ tall; just a little bit bigger than most loyalty card sizes to help it stand out on the key ring.
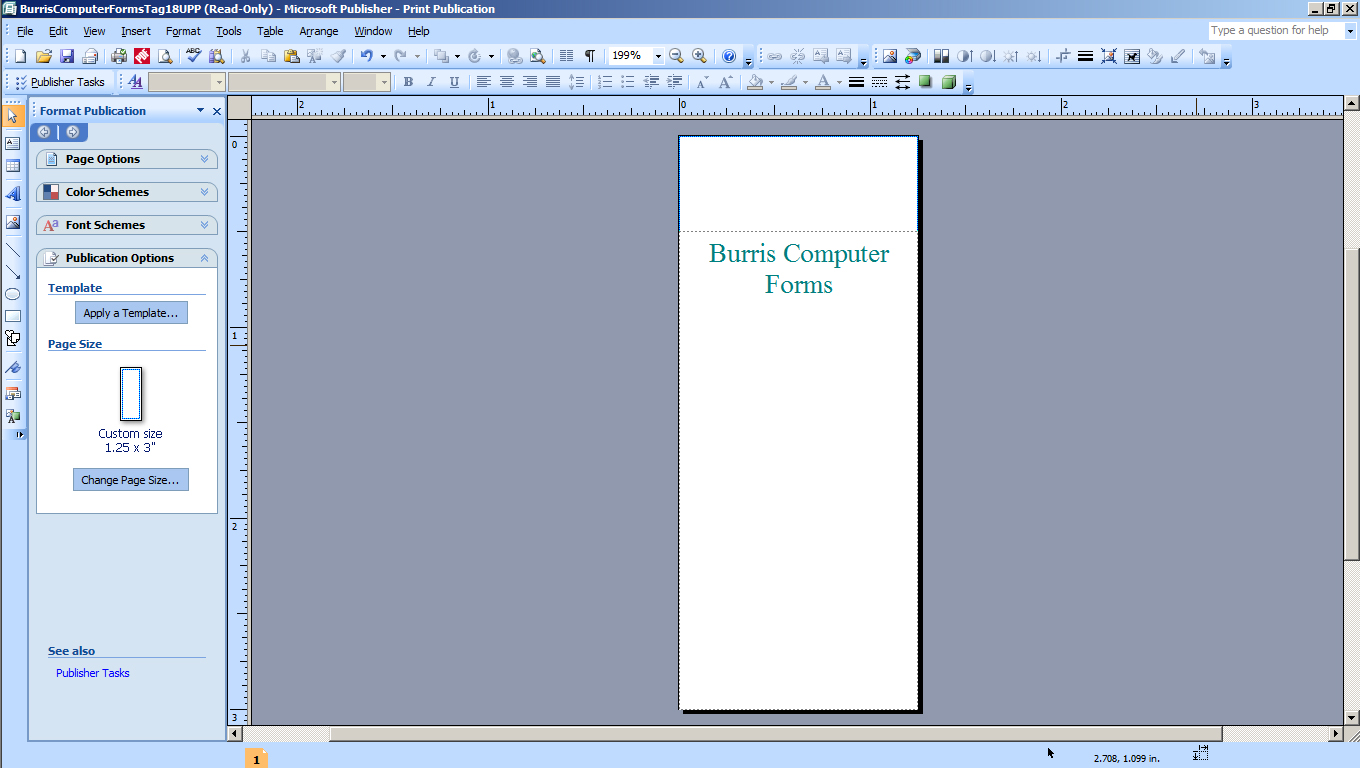
Step 2: Open the Template in Microsoft Publisher
Since we want all the tags to look the same, we’ll be using Publisher so that we don’t have to copy and paste the design like we would have to do for Microsoft Word. Open the template in Microsoft Publisher (some may have opened automatically).
When it opens, you’ll see the skinny shape of a single tag. In Microsoft Publisher you design one instance of the object you want and it will fit as many instances of that object on a piece of paper as it can.
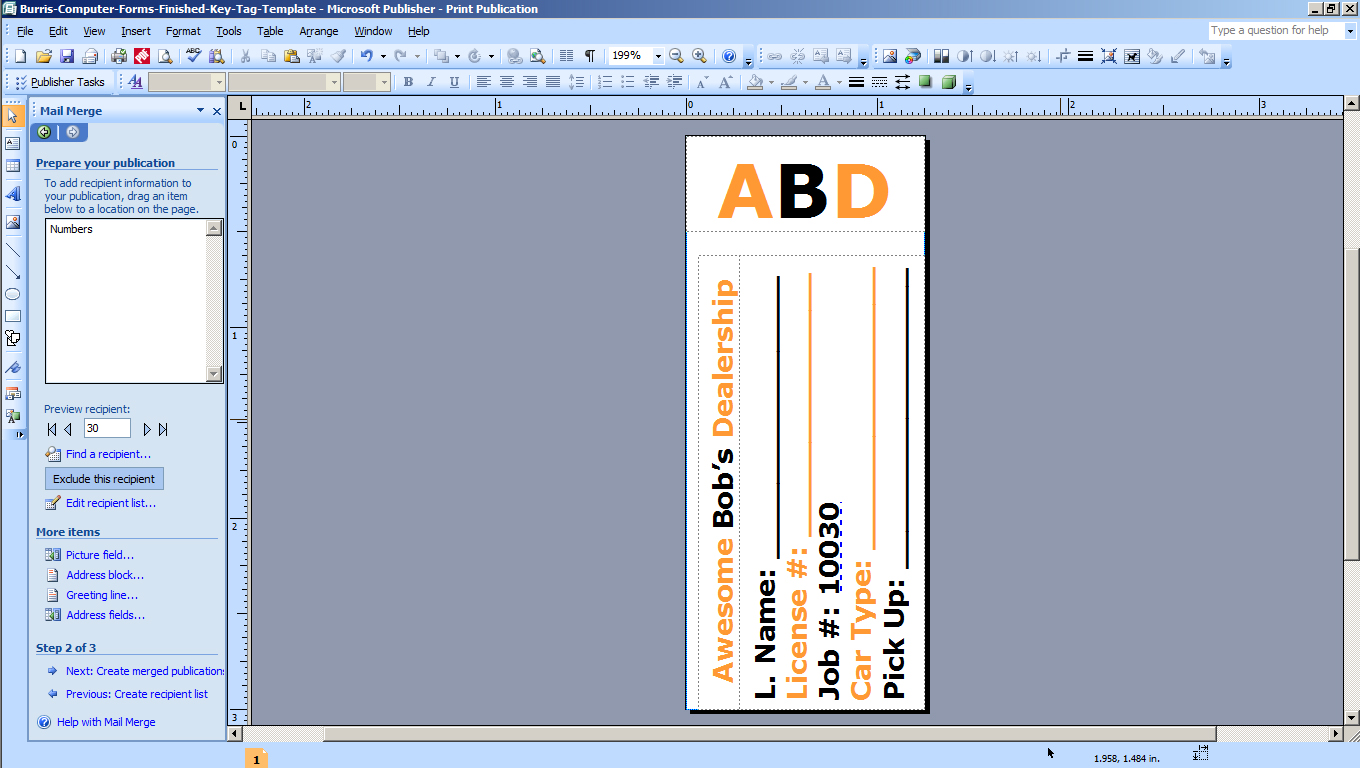
Step 3: Design Your Key Tags
Now it’s time to design your key tags. If you have a set of bar code numbers youd like to use, you can mail merge those bar code numbers in. Remember that there is a small hole at the top of each tag to be punched out. The bottom of the hole is at 0.5″ in the single tag instance; try to keep your design at 0.75″ and below.
Make sure to include all of the information that your garage will need. It’s a good idea to consult with them to find out what they look for on each key tag. This could include:
- Customer’s last name
- License plate number
- Job number
- Appointment time
- Etc.
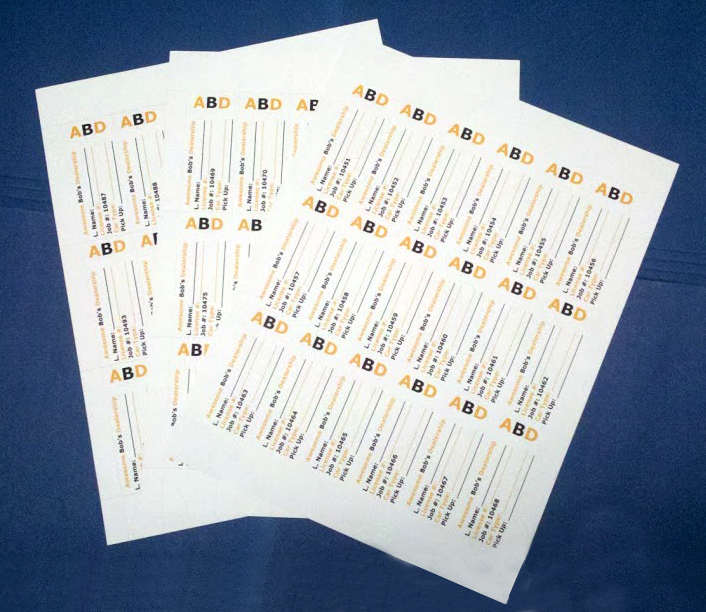
Step 4: Print Your Key Tags
Now you get to print your key tags. When printing, make sure you select “Multiple Pages per Sheet” so that Publisher prints more than one key tag per page. Make sure your Margins and gaps are set to the following:
- Side margin: 0.5″
- Top margin: 1″
- Horizontal gap: 0″
- Vertical gap: 0″
Remember to always test on a plain sheet of paper first! Compare the plain piece of paper and your tag stock by putting one behind the other and holding it up to the light to make sure everything lines up.
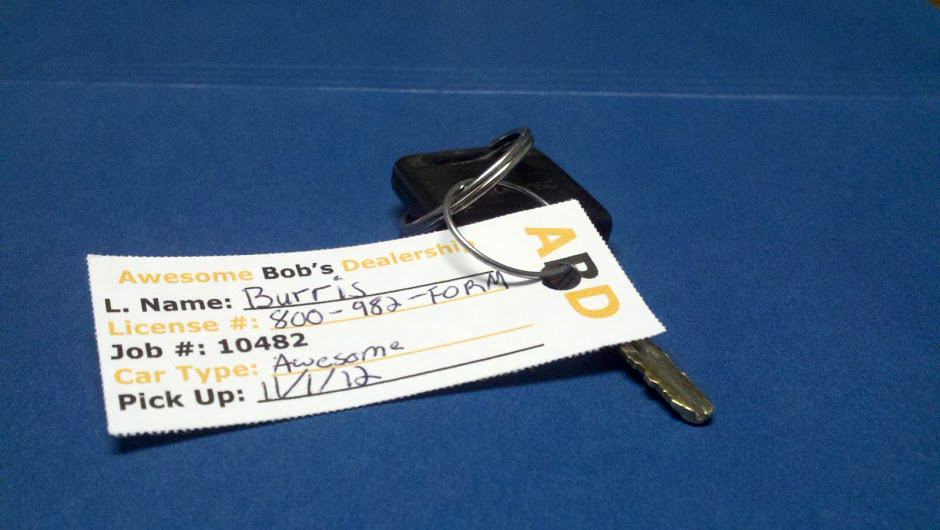
Here’s how ours turned out. How did yours turn out?

Get started printing your own today!